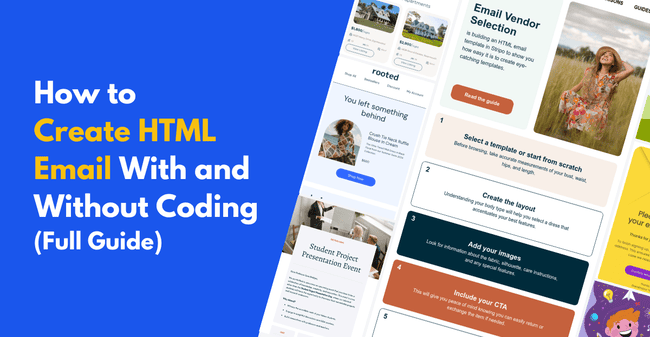
How to Create HTML Email With and Without Coding
Emails are a great way to reach out to any audience. But inboxes get crowded. If you’re going to have the impact you want, you need your emails to stand out from the crowd. You need your emails to look great and read great.
How do you do that? You design them using HTML code. The same way you design and build a web page.
Great if you have the programming skills to code an HTML email. But here’s the good news. You can create an HTML email from scratch without any code at all.
In this article, I’m going to walk you through both methods. Building HTML emails with code, and without code.
What is an HTML Email?
An HTML email is an email created using computer code. Like web pages, HTML emails are built using so-called ‘markup’ languages HTML, CSS, and XML. HTML stands for hypertext markup language. It builds the structure of a web page or email.
CSS stands for Cascading Style Sheets. This language styles how things look on screen. XML is short for Extensible Markup Language. It helps different computer platforms read the same data.
More simply, an HTML email is an email with a clear visual design. Go to your inbox and open a standard email from a friend or colleague. What can you see? It’s mostly just text. This is called a plain text email.
An HTML email is different because it contains more than just text. Look in your inbox again for an email from a company. Something like a newsletter or a promotional email. Does it look different? It’s more than just plain text, right?
An HTML email is built to look great and grab attention. There’s colour. There are images and graphics. There’s eye-pleasing formatting and style. HTML emails are mostly used by businesses for marketing. Emails are key to how many companies manage customer relationships. But to work, emails need to have an impact. Businesses use HTML email to stand out and grab attention.
Companies need marketing emails to trigger a response. That’s why HTML emails often include ‘calls to action’, or CTAs. It’s not enough if recipients just open and read the email. Businesses need subscribers to act. Click through to view a special offer. Sign up for a new service.
An HTML email is a vehicle for these CTAs. Create a pretty email. Grab attention. Get your audience to act. Let’s look at how it’s done.
How to Create an HTML Email without Coding
HTML without code? Isn’t that a contradiction? Not if you have a drag-and-drop editor.
Website platforms like Wix and Squarespace have been using them for years. They were real game-changers in web design. With a drag-and-drop editor, anyone can build attractive, functional websites. You don’t need to have coding skills.
The same has happened with emails. If you use an email marketing service, chances are it has a drag-and-drop email builder. It’s how you speed up email production, fast. Like their web editor cousins, they’re super easy to use. You only need basic IT skills.
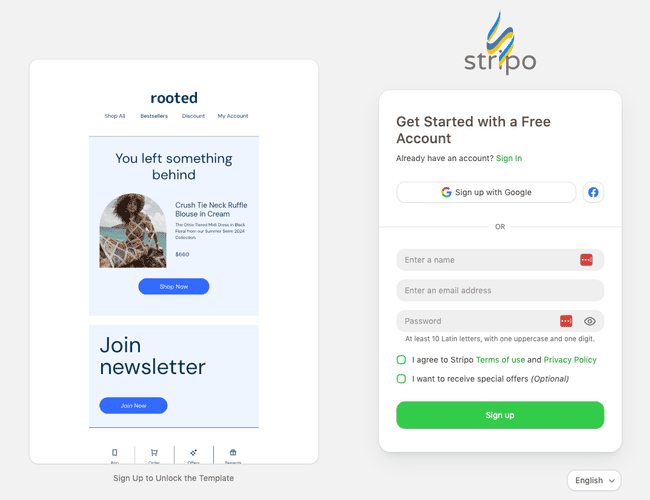
For this article, I chose to use Stripo. It’s one of the best email template builders. Not only can you build great-looking, responsive emails fast and simply. It’s also free to use. And did I mention how easy it is?
Stripo lets you save bits of design to use again on future projects. If you’re part of a team, you can add comments for teammates for real-time collaboration. And you get email support for free. Let’s see how it works.
1. Select a template or start from scratch
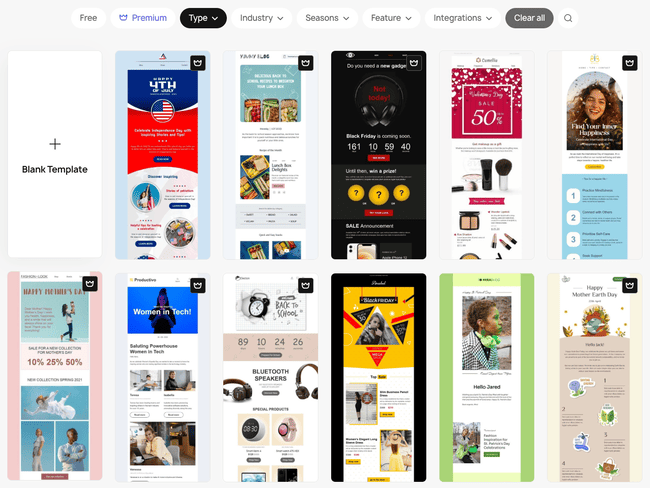
Stripo has more than 1600+ free HTML email templates. That’s huge! Whatever type of business you’re in, you’re sure to find an HTML email template that fits.
To help you find the right one, templates are grouped by type, industry, seasons, features, and integrations. I find the type and industry categories most useful. Here you can access 406 different promotional email templates. Or 275 templates for promoting an event. There are some cool niche categories, too. Want to tease your contacts with an HTML email that gets them guessing at what comes next? Choose from one of 16 teaser templates!
Seasonal templates are also handy for tying a promotion to the time of year. Stripo has over 800 holiday-themed templates. The feature category includes email templates with 3D graphics, AMP elements, CSS animations, carousels, and videos.
You don’t have to choose an HTML email template. If you’d rather go it alone, just choose the ‘Start from Scratch’ option. That’s what I did to build the email template below. And I’ll walk you through exactly how I did it.

Browse 1600+ HTML email templates
2. Customize your email
Whether you choose an existing HTML template or a blank canvas, the process is the same. The Stripo editor lets you customize layouts, text, images, and colour schemes. And you use the same tools to build designs from scratch.
Creating the layout
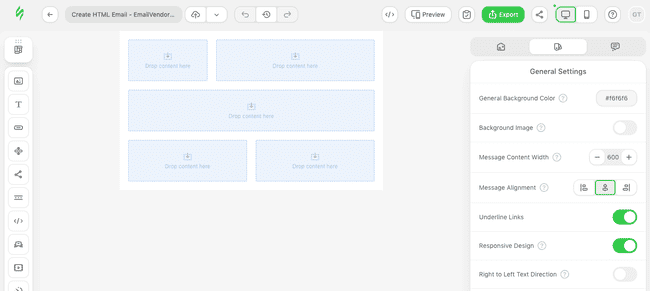
This is what the editor looks like with a blank template. I could have started to pull content blocks in from the left straight away. Instead, I removed the empty containers and opened Structures & Modules to find some prebuilt structures to save some time. I decided to pull in a 3 pre-built blocks and my template is already starting to take shape.

I now have an HTML email template with a logo, navigation, and 2 cards in the header.
What if I wanted to match the colours to my brand colours? To set a colour scheme for the whole email, go to Stripes and there you can choose background colours for the stripes and content blocks. I’m happy with the colors already, so I left that as is.
Drop your images
I decided I also want to add a main image to the header card on the right. So I removed the header, text, and button to make space for an image.
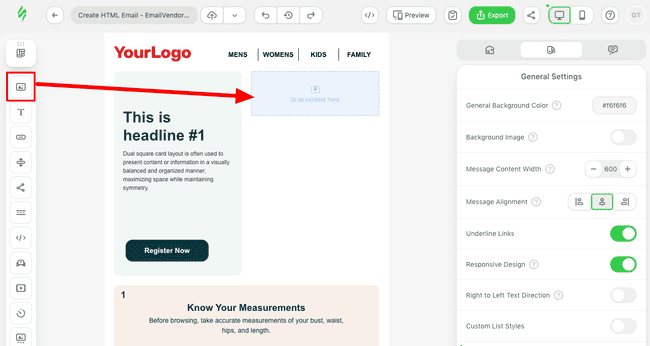
Stripo makes adding images to your HTML email easy. When you add an image block, you will see the ‘Image Gallery’ on the right.
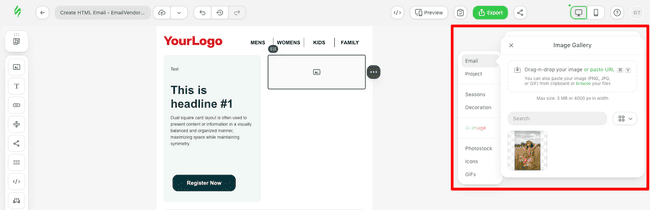
You can add your own images by uploading pictures from your computer. Or paste image URLs to add images from the web.
Stripo’s own free stock image library is called Photostock. This is a brilliant resource. There are over 500,000 images available through Pexels and Pixabay.
Stripo also has built-in image generation. You can generate images with DALL-E, Gemini, and Stability in 3 different aspect ratios. The huge built-in icon and GIF galleries make it very easy to add any kind of visuals.
You can also find seasonal graphics for Christmas, Black Friday, Cyber Monday, Easter, Halloween, New Year, and all other major international holidays. Decorations include balloons, banner frames, checkmarks, discounts, loaders, and presents. Some of the graphics are a bit outdated.
All images then get stored in your own File Manager. Once added, you’ll see all your image files every time you click the image block browse button. Just click Insert to add an image to your email.
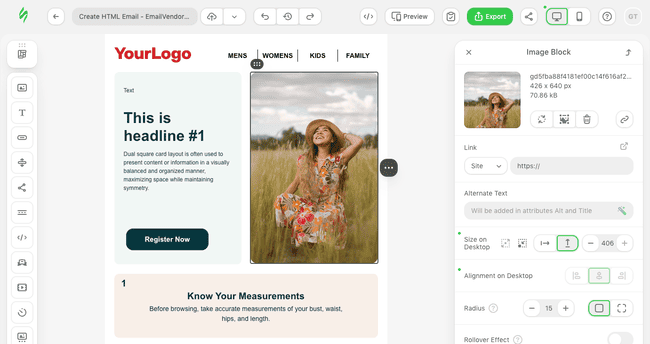
Back in the editor, click on the image block to edit it. I wanted to resize my image. And make the corners rounded to fit the card on the left. Both were very easy to find on the right side.
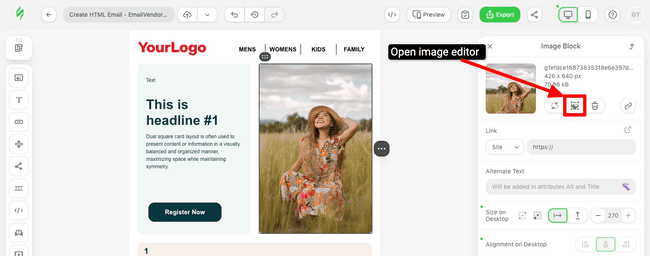
Stripo also has a built-in image editor. To edit your image, you click on the frame icon. Here you find more options for changing the size and layout of your image. You can also apply filters and add text to your image.
Get started with Stripo for free here
Adding text
Next, it’s time to add our text. HTML emails can be as text-heavy or light as you wish. It all depends on what you want to achieve. But I always think it’s a good idea to grab attention first. Focus on eye-catching design and short, clear messages. You can always add more detail further down the email.
It’s super easy to add or edit text in Stripo. All you have to do is click on a text block and type.
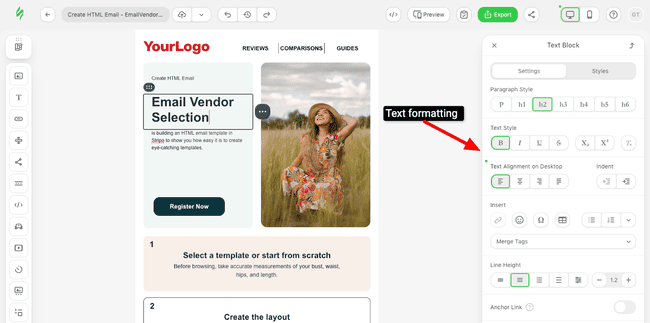
I started with the header. When you click on a text block, the formatting menu appears on the right side. You can change the paragraph style, text style, alignment, size, and colour. It also has extra options. Things like adding special characters and emoticons, or hyperlinks.
Stripo includes email-safe fonts and even some Google Fonts, like Arvo, Lato, Lora, Merriweather, Open Sans, and Roboto. And you can even add custom fonts to Stripo.
Include your CTA
So onto the final piece of the design, the CTA button. To customize your CTA button, click on the block in the editor preview. You see all editing options on the right. This is where you can add the link, edit the button text, and format the button itself.
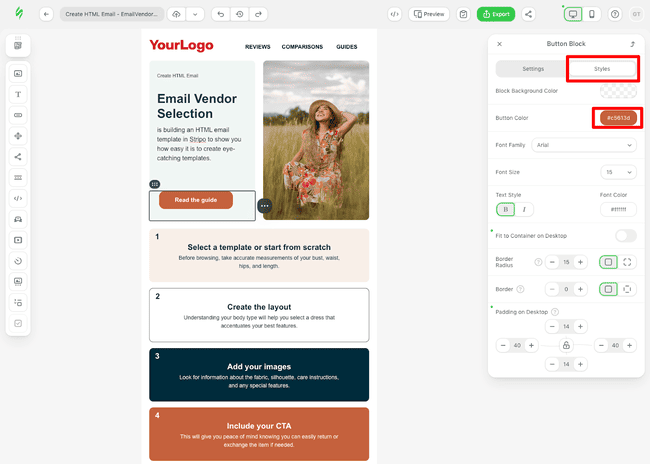
After typing my CTA and adding my link, I wanted to change the colour of my button. I opened “Styles” and copied and pasted the colour code of a block further down to have a more contrasting colour that fits my colour palette.
3. Export your HTML email
Your no-code HTML email is made. Now for the important part. Sending it!
Stripo isn’t an ESP or an email marketing platform. So you can’t send directly from Stripo. But it’s really easy to export your design to the best email marketing platforms.
When you’re ready to use your design, click Export. A pop-up menu appears with 3 options:
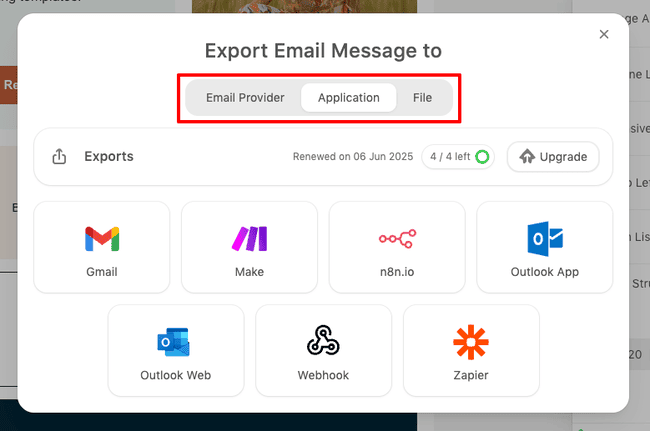
File downloads your email template in AMPHTML, HTML, Image, or PDF formats. The HTML method will work for most ESPs, and it’s free. Check to see if your ESP has an HTML import option. If they do, great. You can upload the ZIP file, and send campaigns with your custom template.
Application includes Gmail, Make, n8n, Outlook, Webhook, and Zapier integrations.
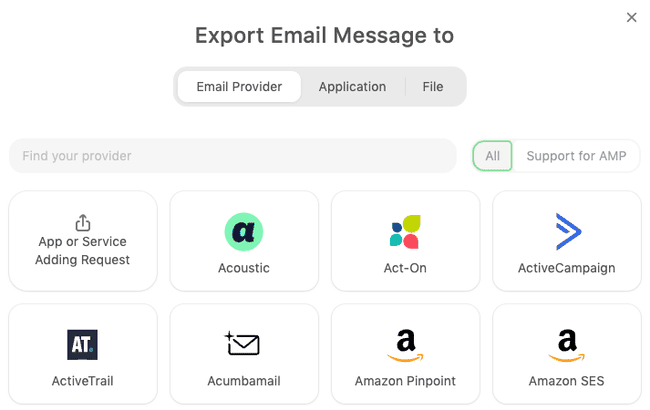
Email Provider is the easiest option. It uses integrations to export your HTML email straight to your ESP. This is available for 75+ platforms like ActiveCampaign, Brevo, Hubspot, MailerLite, Moosend, and GetResponse.
How To Code An HTML Email
On to our second method for creating an HTML email. Writing the HTML code yourself. For this, you need to know HTML and CSS.
Why do that if modern no-code editors are so easy to use? HTML programmers argue that coding gives them more freedom and control. Drag-and-drop editors are easy to use. But you’re always using pre-formatted templates and content blocks. Yes, you can customize it all. But there are limits to what you can do.
If you create an HTML email by coding, you take those limits away. You build the templates, the content blocks, and the overall designs completely from scratch.
So how do you do it? You don’t need special software to code HTML. You can use a simple plain text editor like NotePad. Once you have written your script, upload it to your email platform.
But it’s a good idea to use an HTML editor. They come with many useful features, such as highlighting errors in your code. Some even show you the design your code is creating as you write it. Most professional web developers use HTML editors these days. There are lots of options. Read our guide to the best HTML editors to help make your choice.
For this project, I went for CoffeeCup. It’s a WYSIWYG HTML editor. Which stands for “what you see is what you get”. That means you see that you code as you write it. It also has useful features like HTML code templates you can use. It’s a good ‘in-between’ option. It gives you more control than a drag-and-drop editor. But it helps you out if you’re not a coding expert.
1: Doctype
The first stage in coding an HTML email is to set a Doctype. This tells the software reading the code that it’s dealing with HTML. And also what version of HTML you’re using. This is important, so email clients know what tags to expect and interpret them correctly.
Every piece of HTML code should start with the <!DOCTYPE html> tag.
For a long time, the recommended version of HTML for coding emails was XHTML 1.0 Traditional. This is a hybrid language that covers both HTML and XML syntax. XML makes it easier for different services to interpret data consistently. This is important if you want your emails to look good across lots of different email clients.
These days it’s best to use HTML 5 to code emails. HTML 5 is the latest version of HTML and also covers XML syntax. This makes life easier as you only have to use the <!DOCTYPE html> tag. The software assumes you mean HTML 5 by default. If you want to use another version of HTML, you have to specify this.
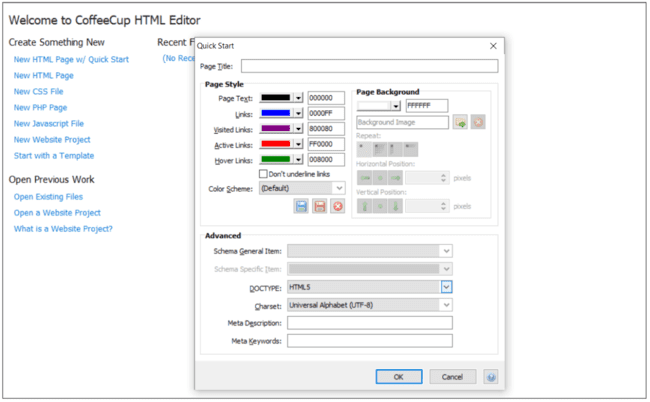
In CoffeeCup, you can set the Doctype using the Quickstart option. That gives you a choice of HTML versions in a drop-down menu. HTML 5 is the default.
The <!DOCTYPE html> tag alone doesn’t set you up to start coding. You also need a pair of opening <html> and closing </html> tags. All code you write for your email has to sit within these tags.
You should also use the <html> tag to set the language for your email. The tag for English, for example, is <html lang=”en”>.
Again, the Quick Start option in CoffeeCup lets you set this automatically.
2: How to prepare Your HTML <Head> template
There’s a lot of prep work when coding HTML. You spend as much time setting up your document as you design and add content. The Doctype and <html> tags are just the start. After that, it’s time to add an entire section of code that is all about setup. The <head> section.
Don’t confuse this with the header of your HTML email. The header is the top section of your email’s content. The <head> section of your code isn’t anything you see in your design. It sets metadata for the rest of the document. Like the Doctype tag, metadata tells the email client important information. This includes more details about how the code should be read. But it’s also where you set the specific styling and formatting rules for the document.
<!DOCTYPE html>
<html lang="en">
<head>
  <meta name="viewport" content="width=device-width,initial-scale=1">
  <meta charset="utf-8">
  <title>Sample email template</title>
All metadata has to go between <head> and </head> tags. Here are 2 common meta tags you will want to use:
- Viewport: Every email head should contain this tag: <meta name=”viewport” content=”width=device-width, initial-scale=1.0″>. This fixes the visible area of your email to the width of the device screen.
- Charset: Computer software can’t read text characters directly. They need codes to interpret them. The character set tells a software which code library to use. UTF-8 is the most common.
You can also give your HTML email template a name. Type the name between the <title></title> tags. If someone opens your email in a web browser, the title will display in the tab.
3: How to style your email HTML
The <head> section is also important for styling your HTML email. It’s where you set style rules for the whole email.
HTML is styled using a different coding language called CSS. You use CSS to set colours, font types, sizes, and layouts.
<style>
    body {
      color:#000000;
      background-color:#FFFFFF;
      background-image:url('Background Image');
      background-repeat:no-repeat;
    }
    a  { color:#0000FF; }
    a:visited { color:#800080; }
    a:hover { color:#008000; }
    a:active { color:#FF0000; }
  p1 {font-family: Arial, sans-serif;}
  </style>
CSS style rules can be added to any part of an HTML code. But there’s one very good reason to add CSS to the <head> section of an HTML email. Gmail ignores CSS in the body content. Some of your subscribers are bound to use Gmail. It’s the world’s most popular email service provider. If you don’t set CSS rules in the <head> section, your email won’t look right in their inbox.
All style instructions go inside <style></style> tags. In the above code, I set the following style rules.
First, I set the default font colour (“color”) to black (#000000). And the background colour to white (#FFFFFF). I also created a space for adding a background image from a web URL. The ‘no repeat’ instruction means any background image will only appear once.
Under, the “a” tags set text colours for unopened and opened links. Then the <p1> tag sets the default paragraph font type. You could set different fonts for different sections using <p2>, <p3>. And you could do the same for headings using <h1>, <h2>, <h3> etc.
Media Queries: Coding a responsive email template
You have to think about how your email design will look on different devices and in different email clients.
Different screen sizes and different software change the way the same email looks. Your aim is to make a single design look as good as possible on every platform. This is called responsive design.
HTML and CSS give you other tools to do this. We’ve already seen the viewport meta tag. Making sure the visible area of your email changes with different screen sizes is a good start. But there are other differences you have to consider. Like screen resolutions and browser window dimensions, etc.
CSS media queries tell different email clients and devices how to display your email. Here’s an example:
@media screen and (max-width: 600px) {
  .column {
    width: 100%;
  }
  div.example {
    font-size: 30px;
  }
  }
  @media screen and (max-width: 900px) {
  .column {
    width: 50%;
  }
  {
  div.example {
    font-size: 80px;
  }
  }
  </style>
This code changes the layout depending on the size of the screen. The ‘max-width: 600px’ rule applies to smaller screens less than 600px wide. Such as mobile devices. On these screens, my email will display with a single column and default 30px font size. On screens up to 900px, it will have two columns and bigger text.
4: Final email <head> code example
So that’s the <head> code finished. Here’s how mine looked:
<!DOCTYPE html>
<html lang="en">
<head>
  <meta name="viewport" content="width=device-width,initial-scale=1">
  <meta charset="utf-8">
  <title>Sample email template</title>
  <style>
    body {
      color:#000000;
      background-color:#FFFFFF;
      background-image:url('Background Image');
      background-repeat:no-repeat;
    }
    a  { color:#0000FF; }
    a:visited { color:#800080; }
    a:hover { color:#008000; }
    a:active { color:#FF0000; }
  p1 {font-family: Arial, sans-serif;}
  @media screen and (max-width: 600px) {
  .column {
    width: 100%;
  }
  div.example {
    font-size: 30px;
  }
  }
  @media screen and (max-width: 900px) {
  .column {
    width: 50%;
  }
  {
  div.example {
    font-size: 80px;
  }
  }
  </style><!--[if IE]>
    <script src="http://html5shim.googlecode.com/svn/trunk/html5.js"></script>
    <![endif]-->
</head>
I should stress that this is a simplified version. A genuine <head> section for an HTML email can be much longer. It seems a lot just for setting up your HTML email template. But this stage is essential. It makes sure different platforms display your email the way you want. And it also gives you complete control of style.
5: How to build your email <body>
Now to create the HTML email content. Everything you want to be visible in your email has to go between <body></body> tags.
If you have experience coding websites, a couple of things you should know at this point. By now you might expect to have set the style rules for your entire page in the <head> section. But it doesn’t quite work like that when you create an HTML email. You end up doing a lot of styling in the body, too.
Why? A lot of ESPs are really bad at reading CSS layout rules. To get around this, it’s safer to build HTML email layouts using tables. But you still have problems if the ESP strips out style rules for your tables in the <head> section. So it’s safer to style tables ‘in-line’ as you build them.
Here’s an example:
<body style="margin:0;padding:0;">
  <table role="presentation" style="width:100%;border-collapse:collapse;border:0;border-spacing:0;background:#ffffff"></table>
  <table align="center" style="width:600px;border-collapse:collapse;border:1px solid #cccccc;border-spacing:0;text-align:left;">
    <tr>
      <td align="center" style="padding:0;">Email Vendor Selection</td>
    </tr>
  </table>
</body>
This creates a ‘nested table’. Or a table within a table. The first is a main table. It becomes the background for the rest of my design. I set the width to 100%, so it fills the screen on any device. And set a background colour, because this table will now overlay my body background. The role=”presentation” code tells the client the table is for visual display. Not data.
The second table is now my content area. The <tr> tag creates a row. The <td> tag creates a cell. For now, it will just display the text ‘Email Vendor Selection’.
Notice this time I fix the width of my table to 600px. This remains the standard width for content elements in HTML emails. It’s based on how most desktop email clients display emails so is a little out of date. But if you get your CSS media queries right it will render easily to mobile.
Also notice that values for margin, padding, and border spacing are set to zero. This is because lots of email engines will add their own margins to tables. So you could end up with lots of white space you didn’t plan for. It’s safer not to add any yourself.
So far I’ve coded one section of my template. This will sit at the top of my page, so call it the header. To add more sections, I just repeat the code for the nested table. By repeating the table twice more, I now have a three-part structure. Header, main body, footer. A simple HTML email template.
<body style="margin:0;padding:0;">
  <table role="presentation" style="width:100%;border-collapse:collapse;border:0;border-spacing:0;background:#ffffff"></table>
  <table align="center" style="width:600px;border-collapse:collapse;border:1px solid #cccccc;border-spacing:0;text-align:left;">
    <tr>
      <td align="center" style="padding:0;">Email Vendor Selection</td>
    </tr>
  </table>
  <table align="center" style="width:600px;border-collapse:collapse;border:1px solid #cccccc;border-spacing:0;text-align:left;">
    <tr>
      <td align="center" style="padding:0;">Logo</td>
    </tr>
    <tr>
      <td align="center" style="padding:0;">Header 1 Text</td>
    </tr>
    <tr>
      <td align="center" style="padding:0;">Header 2 Text</td>
    </tr>
    <tr>
      <td align="center" style="padding:0;">Image</td>
    </tr>
    <tr>
      <td align="center" style="padding:0;">CTA</td>
    </tr>
  </table>
  <table align="center" style="width:600px;border-collapse:collapse;border:1px solid #cccccc;border-spacing:0;text-align:left;">
    <tr>
      <td align="center" style="padding:0;">Footer</td>
    </tr>
  </table>
</body>
Next, I added more rows and cells to the middle table or main body. I created placeholders for text and images. This is how my email looks so far:
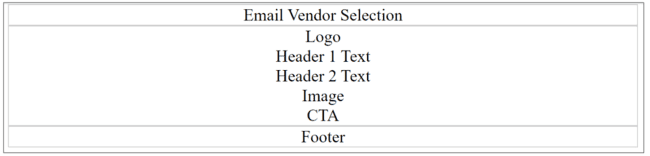
Plain, yes. But now I have a structure, I can start to add content. I can format each row and cell as different elements. I can set different heights and widths to shape them. I can format colors and text types and sizes. From a basic layout, I now have full control over my design.
It takes a lot of coding to turn this plain outline into a completed email. Here’s what I did next to my header section:
<body style="margin:0;padding:0;">
  <table role="presentation" style="width:100%;border-collapse:collapse;border:0;border-spacing:0;"></table>
  <table align="center" style="width:600px;background:#000000;border-collapse:collapse;border:1px solid #cccccc;border-spacing:0;text-align:center;">
    <tr>
      <td align="center;">
        <h1 style="font-size:18px;margin:10px 0 10px 0;font-family:Arial,sans-serif;color:#ffffff;">Email Vendor Selection</h1>
      </td>
    </tr>
  </table>
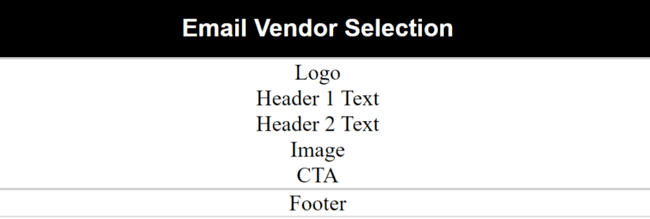
I used the <background> tag to turn the table black. Because I’m using nested tables to structure my email, I will have to do this for every table. Then I changed the text colour of the <h1> tag to white. Setting the colour of every text element separately gives you more flexibility.
Notice that I also set margins for the <h1> tag rather than for the table. This stops email clients applying default margins around text. If they do, your email will look different on every client. The font size and margins also control the height of the row.
6: HTML email newsletter footer
You might think the bottom-most section of your email is not very important. Does anyone look all the way down here, anyway? But paying attention to the footer of your newsletter is important.
It’s where you include contact and subscription information. This should include details about how the recipient subscribed to your newsletter. And how they can unsubscribe. This is a legal rule in most countries now.
Some things to include in your email template footer are:
- Company details.
- An email to send queries to.
- Social media icons. Give subscribers a chance to follow you elsewhere.
- A reminder of how the person signed up to receive your emails.
- An unsubscribe link
- Copyright details.
As for creating your footer, again the easiest way is to nest tables. This time I added a new table within the existing ‘footer’ cell. This meant I could create 2 new cells to make columns. By setting the cell width to 50%, you automatically get two columns.
<table align="center" style="width:600px;border-collapse:collapse;border:1px solid #cccccc;border-spacing:0;text-align:left;">
<tr>
<td align="center" style="padding:0;">
<table role="presentation" style="width:300px;border-collapse:collapse;border:0;border-spacing:0;">
<tr>
<td style="padding:0;width:50%;" align="left">
<p style="font-size:8px;margin:5px 0 0 0;font-family:Arial,sans-serif;">© Email Vendor Selection 2026</p>
</td>
<td style="padding:0;width:50%;" align="right">
<a href="url" style="font-size:8px;font-family:Arial,sans-serif;">Unsubscribe from this newsletter</a>
</td>
</tr>
</table>
</td>
</tr>
</table>
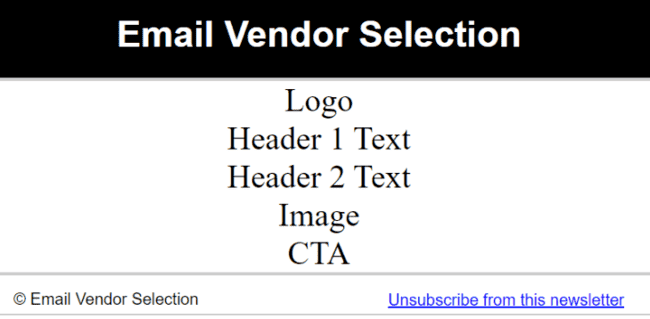
Then I set style rules as before. The <a href> tag creates a hyperlink for my unsubscribe option. You should create a dedicated unsubscribe page on your site. Paste the URL next to the href tag. People can then use this link to opt out of your emails. You can even set this up so the opt-out happens with a single click.
List-unsubscribe header
Your email footer isn’t the only place you should have an unsubscribe option. It’s good practice to have a link in the email client header. This is where the subject line and email sender are displayed when someone opens an email.
You may need some help setting up a list-unsubscribe header. If you send emails through an email marketing service, you should be ok. Most will have list-unsubscribe as an option. Some make it default.
But to send through normal email clients, you will need to contact the administrator. They will have to enable list-unsubscribe on your emails.
You can use a landing page URL as explained above. This is called an HTTP list-unsubscribe header. Another option is to give your ESP an email address. This is called a mailto unsubscribe header. When someone clicks the link, it will send an email to the address you give. You will then have to unsubscribe them manually.
7: Test your email template code
I’m leaving testing to the end, but you shouldn’t. It’s important that you test HTML emails right the way through development. You need to know straight away if something doesn’t work right. Leave it until after you finish coding, and you could face a huge job fixing it.
One of the reasons I use CoffeeCup is that you can preview your code with a single click. This is great for checking your HTML email looks the way you want as you work. But it doesn’t tell you how your emails will look on different email clients or browsers. Or how it will render on mobile devices.
For this, you need a dedicated testing tool. Some popular options to try out are HTML Email Check, Litmus, or Email on Acid.
Use Your HTML Email Template Code in your ESP
So you’ve tested your code, and it looks great on all platforms. Now the important part. Sending it.
How you add HTML code to an email depends on the ESP. In Gmail, there’s a simple trick. You don’t need to add the HTML code to your email. Instead, save your code as a .html file. Then open it with your browser. You should see the completed design of your email. Copy and paste this into the Gmail Compose window and hit send.
In Outlook, you have to change the message format to HTML. In Settings, there will be an option called ‘Compose message in format’. Click on this, and select HTML. Now you can paste your code into the Compose window. Outlook will convert it when it sends.
Most email service providers and CRMs with email marketing will let you import HTML code to create a new template. You can then use this to send a campaign. How you add HTML will be different on every platform.
Conclusion: Creating an HTML email
Code or not to code? That’s the big question when you create HTML email. In this article, I’ve run through both options. But which is right for you?
There’s no doubt that using a no-code drag-and-drop editor is the easiest way to create an HTML email. If you don’t have any HTML coding skills, this is the one for you. Or even if you know how to write HTML, using a no-code editor is still quicker. You can save yourself lots of time.
With a tool like Stripo, you can build great-looking HTML email templates in minutes. They’re responsive by default. And you can use it for free. If you want to check out alternatives to Stripo, read our review of 12 free HTML email editors.
So, case closed. No code over own code all the way? No, we can’t dismiss writing HTML code for emails altogether.
Let’s remember why we want to build HTML templates ourselves in the first place. To get unique designs that reflect our brand. Writing code from scratch gives you greater freedom and control over the design. So if you have the skills and want something very custom, coding still makes sense. Just be aware, it’s a technical process.
Create your own email template with Stripo here
How to Create HTML Email FAQ
How do you write an email in HTML format?
Coding HTML from scratch is what a professional email designer might do. It gives you complete control over the design process. But coding HTML is not easy. You need a decent level of programming expertise to get good results. You can use an HTML editor to help check and test your code. But it will still take time and skill.
Using a drag-and-drop email editor is much easier and faster. You don’t need any coding skills at all. Most email editors, like Stripo, offer free templates you can customize. These templates are fully responsive, so they will work in any email client or browser.
Get started with Stripo templates for free here
Can I create an HTML email in Gmail?
Once built, open your script in a web browser. This will show you how your email looks. Now copy and paste everything you see into the Gmail Compose window. We recommend Stripo to create great-looking HTML emails you can send with Gmail. They have 1600+ templates to choose from and an easy-to-use editor.
Try Stripo for free here
What is an HTML email template?
HTML stands for hypertext markup language. It’s a programming language that controls the visual design of web pages and emails. HTML creates a template for content to be added into. An HTML template controls things like layout, colour, size, and shape of elements.
Email editors like Stripo offer ready-made HTML email templates. These are well-formatted and fully responsive. You can find lots of free email templates online. They make it quick and easy to create an HTML email.
How do I create an HTML email in Outlook Web?
Outlook Web is set up to send plain-text emails by default. Change the message format to HTML to create and send designed emails.
Unlike other webmail clients like Gmail, Outlook Web lets you paste HTML code into an email body. Like a web browser, it will turn the code into a visual design. You can also design an email in an email editor and paste it straight in. Or you can add images and other content to create a design in the Compose window. Outlook Web will convert it to HTML. Read our full guide on how to create an email template in Outlook for more details.
How to send email in HTML?
Others, like Microsoft Outlook, let you paste HTML code into the email body. You have to remember to change the message format settings to HTML.
If you use a no-code HTML email editor like Stripo, you may be able to export your template straight to your ESP. Or you can save your HTML document and images as a .ZIP file. Then upload this to your email client. Most email marketing services let you import HTML email templates to send.